Introduction
There are two ways we can combine our captions and our Quicktime movie. We can combine the video and Quicktime text track movie together into one movie, or we can use SMIL to have the captions and video combined when requested. The following steps explain how to combine video and text tracks together using Quicktime Pro. If you want to use SMIL to combine the two, you may skip this step and continue on to the next section in this chapter titled Using SMIL to Add Captions to Quicktime Movies.
Steps to Combine Quicktime Video and Text Tracks
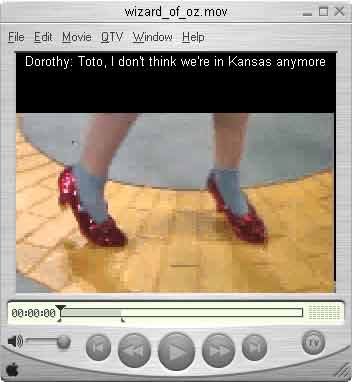
- Open your Quicktime text track movie in Quicktime. Double check that everything looks the way you want it by pressing the play button and watching the movie.
- Select Edit > Select All to select the entire timeline of your text track movie.
- Select Edit > Copy to copy the entire timeline
- Select File > Open Movie in New Player and open the Quicktime video to which you want to add the captions.
- Make sure the playhead is at the beginning of the movie.
- Select Edit > Add. (If you're using Quicktime Pro 4, you need to hold down Ctrl + Alt to see the Add option in the Edit menu). This will combine the text track movie with your video clip. You should now see the captions on your movie. Don't worry about the position now. If you set the width correctly when creating the text track movie, the caption segment should be the same width as your movie file.
- Go ahead and press the play button. Make sure the captions are in sync with the audio and none of the captions are cut off. If there are problems, select Undo from the edit menu until the captions disappear, go back to your caption file or MAGpie and make the changes, recreate the caption file and the text track movie, then start over with step 1.
- To position the captions, select Movie > Get Movie Properties. The Properties window will open. Change the left menu to display Text Track and the right menu to display Size.
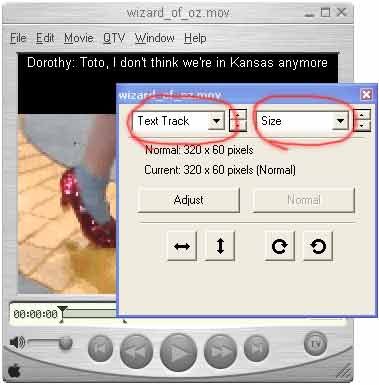
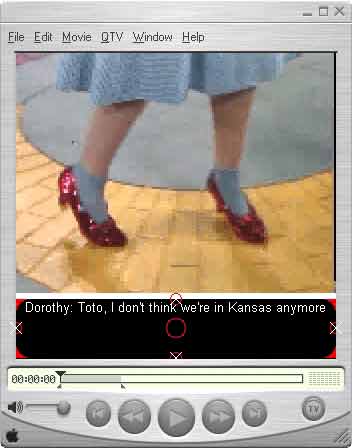
- Press the Adjust button. The caption area will now be highlighted with red markers.

- The normal position for captions is at the bottom of the screen though you can position them any where you would like. To move them to the bottom, hold down the shift key on your keyboard, then click and drag the caption area downward. Holding the shift key ensures that you can only drag the movie at right angles. Be careful not to click on or within any of the red areas on the text track as these are used to scale and rotate the text track. Continue to drag the text track downward until you can see a small gap between the video and the text track. If you make a mistake, just select Edit > Undo.
- Now press the Up and Down arrow keys until the gap disappears. Do not overlap the video with the text track.
- On the Properties window, press the Done button. This will save the text track position.
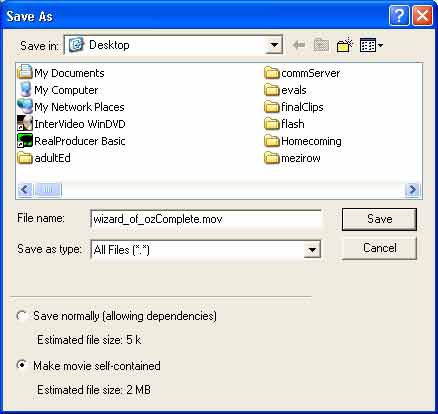
- Go to File > Save As... You must change the file name to combine the video file and the caption file into one Quicktime movie. As soon as you change the file name, the Make movie self-contained option becomes available. You must select Make movie self-contained. This combines the text track and video into one stand-alone Quicktime movie. If you save normally, when you open the video, Quicktime will load the text track movie and display it within the video on-the-fly. Although this is an option, the Quicktime text track movie must always be in the same location it was when the video file was saved. Making a self-contained movie provides just one file for you to keep track of.