The assignment was to send command packets from a computer to a robot. In our case, the robot was a raspberry pi.
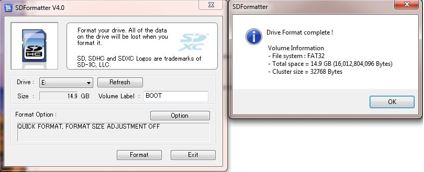
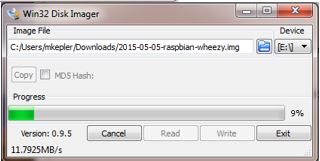
The first step in completing this assignment was to setup the raspberry pi by formatting a memory stick and flashing an operating system on it.
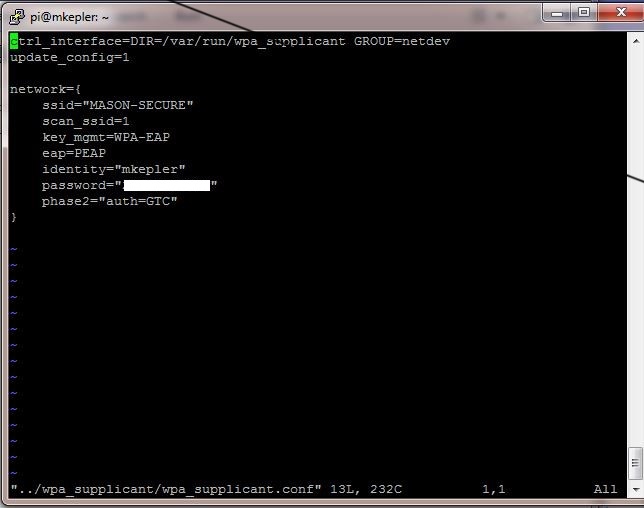
Then the raspberry pi was plugged into a monitor and a keyboard and mouse were attached. Then the pi was booted up, and after expanding the file system, the Wi-Fi configurations were set up by editing the wpa_supplicant.conf file accordingly:
Then the shell command ifconfig was used to obtain the IP address of the PI on MASON-SECURE:
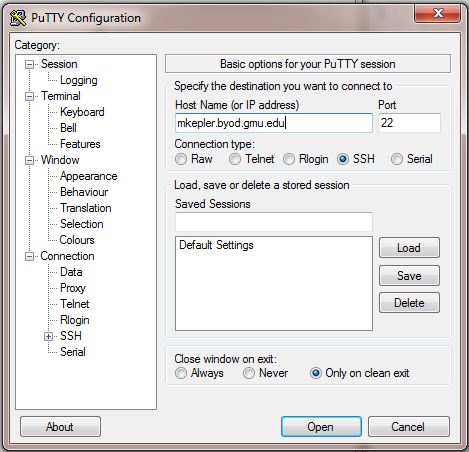
Then using Putty on my computer I was able to login to the PI.
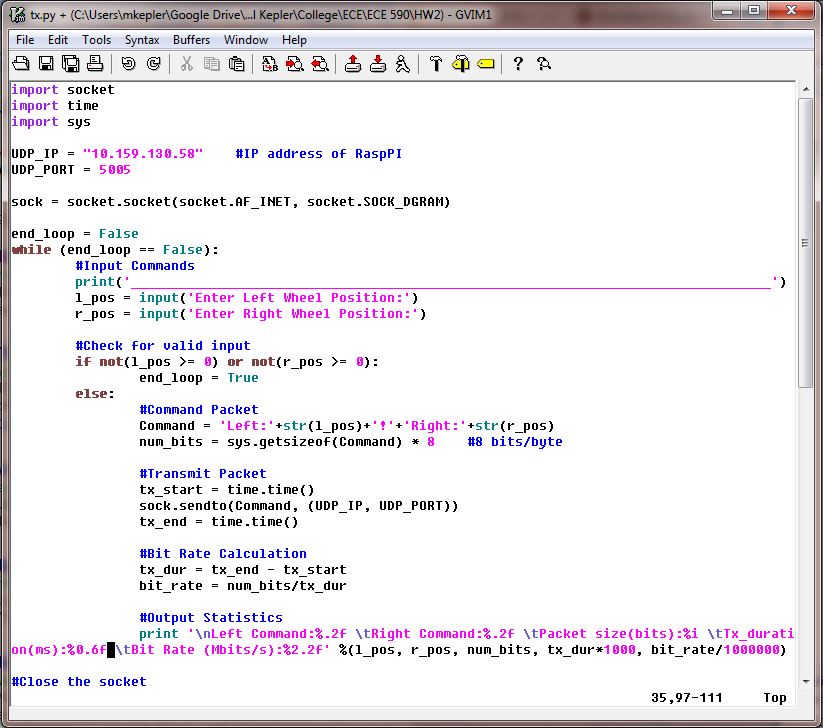
Command Packet Tranmission via UDP
Being logged into the PI, I wrote a program in python to send command packets from my computer to the PI using User Datagram Protocol (UDP) and another program for the PI to receive the command packets.
This is the structure of the packet: Left:###!Right:###
The packets were used to “command” the “left” and “right” DOF’s, in this case I sent command positions, but in all practicality they could be used for any assortment of things.
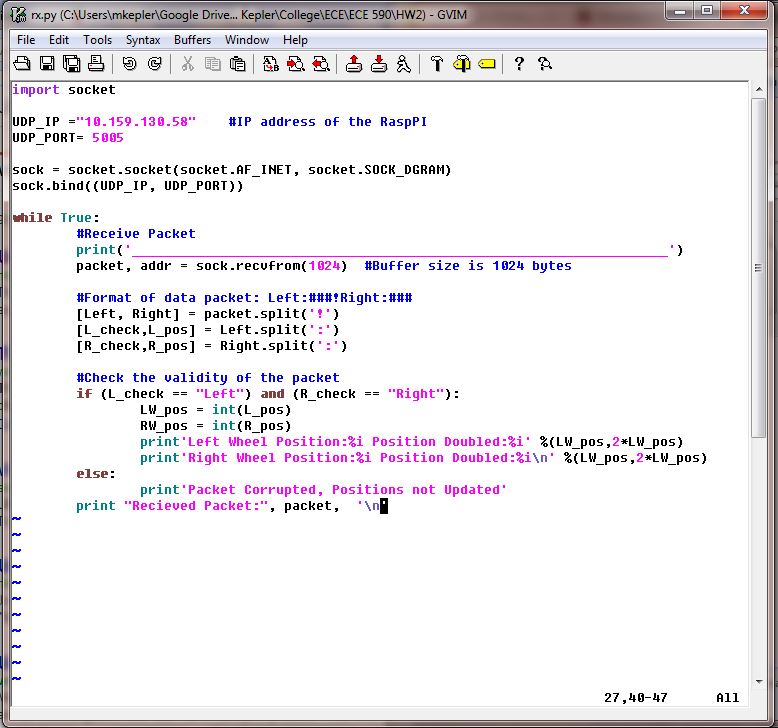
UDP is fast because it has minimal overhead, unfortunately one issue with UDP is this lack of overhead. Packets are subject to corruption since UDP lacks the ability to detect, correct or resend the packet. The data that is intended to be transmitted is not always the same as the data that is received. To mitigate the chances of a corrupt packet controlling the robot, a check was put in place. The receiving program checks to make sure the strings “Left” and “Right” are intact. If they are both present then the commands are classified as accurate. If “Left” or “Right” is corrupt in any way the packet is discarded, and the robot stays in its previous state.
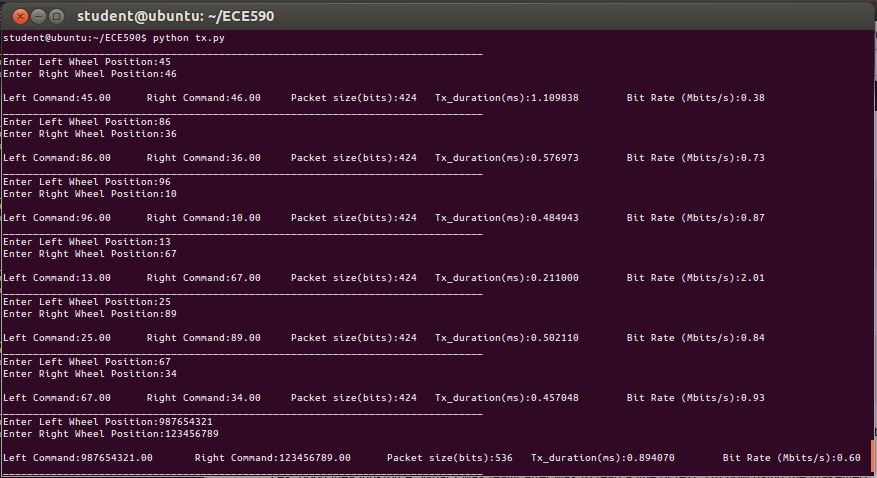
Finally, knowing the size of the packet in bits, and the duration of the transmission, the bit rate was able to be calculated and displayed.
To reinforce that the data from the packet was obtained properly, the data was printed and then the data was multiplied by 2 and printed to ensure the data could be manipulated.
Computer Vision and Image Streaming
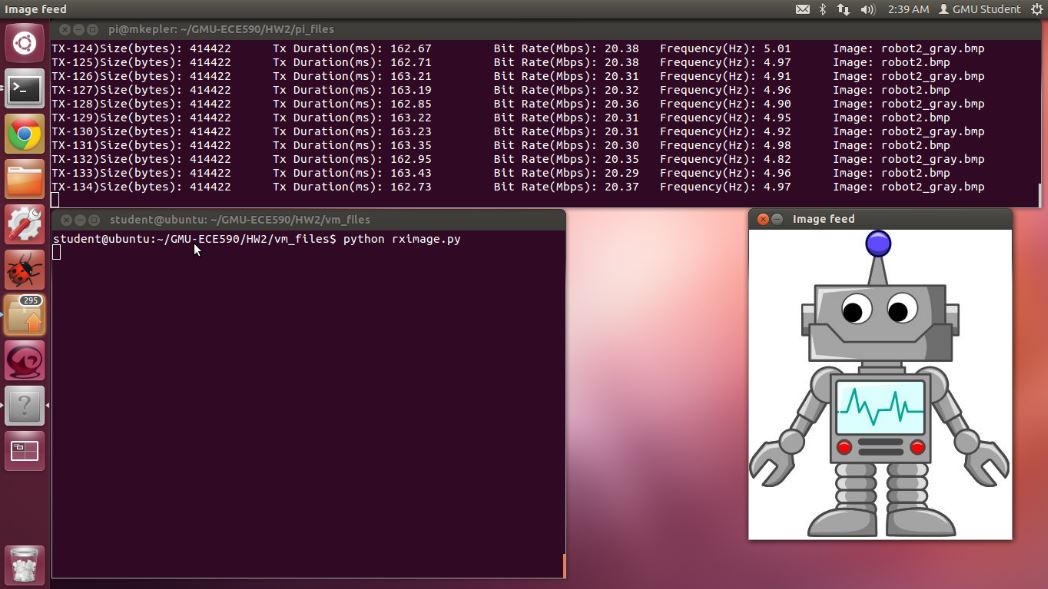
Once again using UDP, I wrote a python program to stream BMP image frames from the Raspberry Pi to my Linux Virtual Machine. The image stream was set to a frequency of approximately 5 Hz. Below are the two image frames that were transmitted:
The original bit mapped image was continuosly transmitted with its respective gray-scaled image. Below is a screen shot of the stream of frames, coupled with the transmision statistics
Below is a video demonstrating the image streaming.
Computer Vision software helps to make useful applications of streaming images. One common application is to have a camera attached to a robot, and stream back the frames from the camera to the remote user.