HTML Basics
You've downloaded your chosen software. Now it's time to start learning HTML coding. It's not as difficult as it sounds. If you ever get confused, there are some great resources that will help you with coding.
Here's the link to a HTML & CSS sanity saving resource: W3Schools
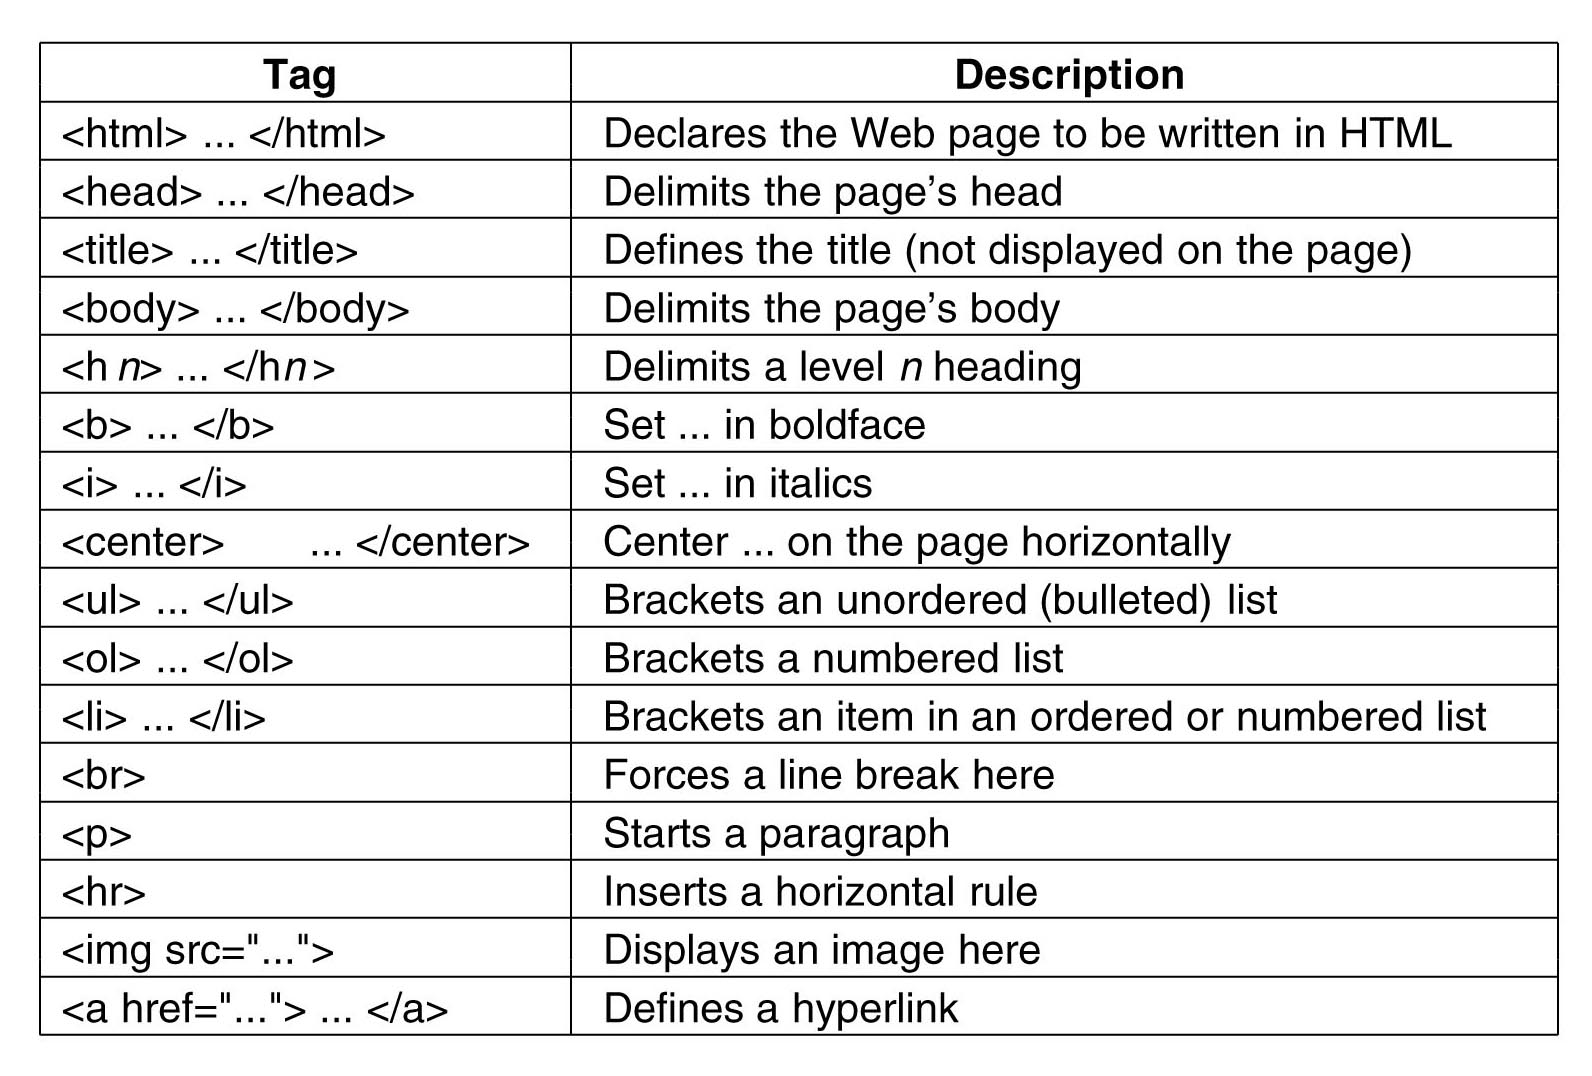
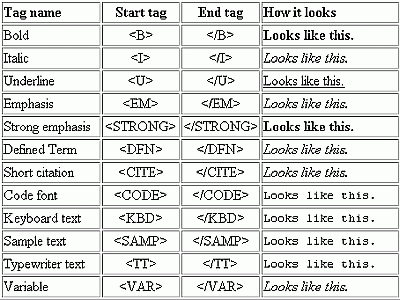
The following two images show a series of HTML tags that you will use and in the case of second can use. Then we can segue into setting up a basic webpage.


OK, Step 1:
Define your document as
<!DOCTYPE html >
This tells the computer of your intention to use HTML code. Quick tip: Start learning and memorizing the language for each step so you don't have to check back every time you start working on building a web page.
Then continue with:
<html>
<head>
<title>simple document</title>
</head>
<body>
<p>a simple paragraph</p>
</body>
</html>
OK, you now have a very basic web page. It's important to know how each of these steps works by themselves and together.
Imagine a web page is a box with a lot of othe little boxes inside. Each box or "tag" holds a separate element that functions differently to all other tags.
For instance, the <body> element is the largest box. The <body> contains everything you're putting in the site. You have to remember though that boxes have to be closed and the same runs true with every step of your code. Always remember to close your code with the same element and a forward slash /. With the the <body> tag, you would close it with </body>.
Remember, close your tags or your website will not work as you want it to. Trust me, it's always just one or two little tags left unclosed that can bug up a website for no discernable reason.
Next, Step 2: Displaying your content.
There are two places it's displayed: the title (<title> </title>) and paragraph (<p></p>).
What does each tag do?
The title contains a short description or the title of what is displayed on the web page. The paragraph element holds almost all of the writing content. Consequently, a webpage is made up of a lot of paragraph elements.
Two tips: use text wrapping for easy editing and don't use uppercase letters in your tags because otherwise your site won't work properly.
Next, Step 3: Content Placement. Imagine you want your content to group together, but not in a completely new paragraph. To make a sentence directly after and single spaced just below it, add a line break (<br />) where you want the breaks.
Step 4: Lists
First, declare a type element. Do you want a numbered or bulleted list(also known as ordered and unordered). Here we'll start with an unordered list (<ul> </ul>). Place the list items in the unordered list as <li></li> and add another set for every new list item. There are a different types of bulleting or numbering you can use. Visit W3Schools for the list-style-types. If you did it correctly, it should look like this:
<p> My favorite hobbies are: <p>
<ul>
<li>Reading</li>
<li>Napping</li>
<li>Eating</li>
</ul>
</p>
An ordered list will look almost exactly the same. The only difference will be the list is numbered and the type element is different.
<p> My favorite hobbies are: <p>
<ol>
<li>Reading</li>
<li>Napping</li>
<li>Eating</li>
</ol>
Next to come: Headers, Alignment, URL Links, Text Formatting Tutorials. An integral part of web design is style and formatting.
Cascading Style Sheets, better known as CSS, allows you to format your website. You can add color, sizing, margin and padding placement. You can use CSS to create a uniform look and only have define something once depending on your design choices. Click here.
