HTML Basics
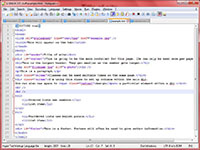
Above is a screenshot of an HTML file I made to demonstrate how HTML works. While I had to make it too small to read, you can right-click on the image to open a larger version so that you can reference it.
Explanation
An HTML file for a web page has two basic parts: the head and the body. The body contains everything that you want to be seen on the page, while anything that goes in the head, like the title or a link to a CSS stylesheet, will not be seen. HTML is a coding language and should therefore be used purely for content or structural work. The design/aesthetics of the page will be done in CSS.
XHTML coding is done using arrow brackets (<>), which create tags, and it is structured into containers, like paragraphs, headers or divisions. Containers like divs are block-level elements, meaning that there will automatically be some white space around them. Inline elements, like spans, don't create space or a line break.
Also worth noting is that, when you are coding, remember that XHTML only recognizes one space, so you can make the coding file look however you want. For instance, in the example above, I tabbed over the list items, because while it won't add extra space in the actual webpage, it helps me stay organized and visualize what I'm doing.
If your page includes an image as the example one does, remember that graphics don't automatically embed, meaning that any images must be moved separately onto the server. You should keep any pictures to a manageable size. Anything over 1 MB will probably be too big, so keep images under 100 KB in size if you can. You can use photo editing software like Photoshop to resize and otherwise alter images.
There are three main image file types that you will use: jpg/jpeg, which is good for color pictures; gif, which works best for line drawings or black-and-white photos; and png, which is okay for either color or black-and-white.
Other things to keep in mind: you can nest tags, meaning that you can apply multiple tags to the same thing. For example, if you want to bold and italicize a particular part of text, you would do (em)(strong)nest(/strong)(/em), except with arrow brackets instead of parenthesis, which I'm using here so that you can see what it looks like. Of course, bolding and italics are design elements and should be done in CSS, but they work here as a demonstration of how nesting works.
It is useful to remember than an equal sign (=) means "go to", and it creates a path, allowing you to link to other sites and files, as seen in the tags used to create hyperlinks and images and to link to the CSS file.
If you want to see how HTML code translates to an actual webpage, here is what my example above looks like with the HTML and CSS combined.
