Making a Website:
Skillz
Now that we’ve outlined the basics of what we are doing, it’s time to get started with how to do it. The million-dollar question is: how do I actually build a website. Well, here we go.
- You’re going to need a space on the internet where you upload your content. This is called a domain, and there are lots of different options out there for buying and occupying space on the internet. I don’t really want to get into all those options right now, so we’re going to talk about using Mason’s server (assuming that everyone who has reached this website is, in fact, a Mason student).
- You need an application that will connect you from your computer to the server of wherever you’re hosting (in this case, GMU’s server). I use Filezilla, which allows you to connect to the server and then transfer files between your computer and the host server. (I assume that Filezilla works with other hosting sites as well, but I haven’t tried it yet).
- Here is where my understanding of the nuts and bolts of web hosting runs out, so I’m going to link you to Mason’s website that will do a slightly better job of explaining things:
First, we’re going to start with HTML.
So, HTML (or HyperText Markup Language) is a coding language, and coding is the process of assigning attributes to content with the intention of putting it on the web. This sounds pretty fancy, but it’s pretty simple. Computer’s don’t read language in the same way as humans, so they need sets of commands to help them interpret how to display the information that you have available. It makes more sense once you start, I promise!
- First, you’ll need an application for writing your code. I use Notepad ++, but Mac users can use Textwrangler.
- Now, you might be wondering why we can’t just use a word processor, and the simple answer is that word processors add unnecessary code to content in order to format it a certain way, so when you transfer that to the Internet, the computer has to muddle its way through tons of code that you might not want to add.
- Now you get to start coding! Here’s some basic symbols and language for coding.
- Know the difference between HTML and CSS
- HTML is a coding language, while CSS (Cascading Style Sheets) is a language used for design. HTML should only be used for the functionality of your website, while CSS is employed for the more stylistic aspects of your site. Make sure to do your foundational premise for your site in HTML and to leave the design and aesthetic choices for your CSS sheet.
- Html elements - everything is split into a series of components, and each component can be coded to act a certain way, and each of those components is then put into a tag.
- […]
- This is called a tag. Every element in HTML needs to be contained in a tag, or else the computer will read that text as content rather than as code.
- A tag needs to open and close. Think of it like a packing box – if you open the lid, you have to close the lid in order to use the box, and it’s the same with a tag.
- [head]….[/head]
- everything in html is lowercase
- I’m not sure why this is true, but every coded element in HTML is in lowercase to keep everything consistent and easy to read. So, everything that goes in a tag of any kind must be lowercase.
- NOTE: Your content can be capitalized as normal, but everything done on a coding level must lack all capital characters!
- HTML functions through a series of hierarchical commands, so a [h1] tag supersedes a [h2] tag and so on and so on.
- DON’T MESS WITH THE HIERARCHY!
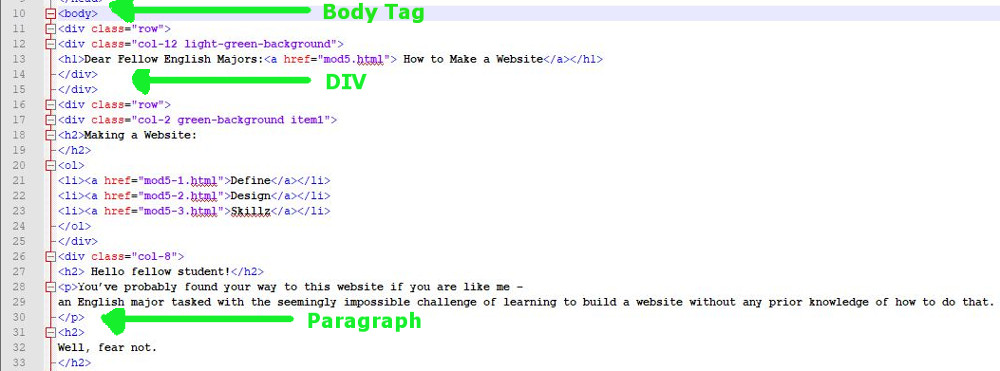
- [head],[body] - the foundation of your page. The head is where the information about the page is found while the body is where the displayable content of your page is located.
- [h1],[h2],[h3],[h4],[h5],[h6] - These are all heading tags that denote different emphasis for content and should be used in that order to illustrate the hierarchical relationship between them.
- [div] - a different section of a document
- [span] - a different section in a document with less padding around it (we’ll get to padding in the CSS section)
- [p] - paragraph tag
- [ul],[ol],[li] - An unordered list, an ordered list, and a list item. A list item must be housed within either an unordered or ordered list, and that [ul] or [ol] tag will determine how those list items are represented visually.
- [em][strong][br] - Emphasis, Bold and Break. Emphasis indicates an italicized item, strong indicates bolded items, and BREAK indicates where a line break should be between lines of text.
Now that we have a basic knowledge of the language, let’s get started!
- Essentially, you’ll need to assign the document a name and then specify that it’s an html document.
 Once you assign this classification to the document, the computer knows how to read the code.
Now, we assign the basics of HTML to the document.
Every single HTML document starts with an identification type that looks like this:
Once you assign this classification to the document, the computer knows how to read the code.
Now, we assign the basics of HTML to the document.
Every single HTML document starts with an identification type that looks like this:

Pro tip: Everything that you open in html (<) needs to be closed in html (/>) If you don’t close it, most computers will still read your code just fine, but it’s bad etiquette… Like ending every sentence with an ellipsis…
- Now onto the main content of your website! This is called the [body] tag in your html, and all your information will be within that container
- Within the [body] is where your content will further be divided into other subsections like [p] paragraphs, [divs], and [spans].
- These tags will help you organize your information hierarchically so your site knows the importance of the content.
Pro tip: When you have multiple tags for a single element make sure that you close them in the reverse order that you opened them. For example, if I am coding an element to say [em][strong] then I want the closing tags to be [/strong][/em] to keep my html organized and easy to read. This feels like a lot of work, but it makes your life easier in the long run!
- Now that you’ve finished the main content of your web, it’s time to close your html document.
Now, just like all the other elements in your page, your site needs to be closed (keeping with that good etiquette I mentioned earlier).
So, you had a title at the beginning of your page, and now it’s time to end it.
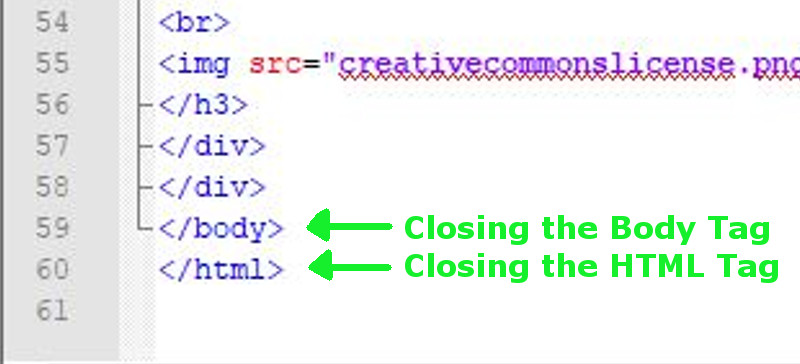
Simple! And now you’re done with your basic HTML!
Pro tip: W3Schools- HTML
- Now you’re going to need to get that HTML sheet to your website. Save your files periodically (preferably as something simple to remember) and pull up Filezilla (or whatever uploading software you are using). Your screen should be split into four quadrants: the two on the left are your computer and the two on the right are the server that you’re trying to upload information to.
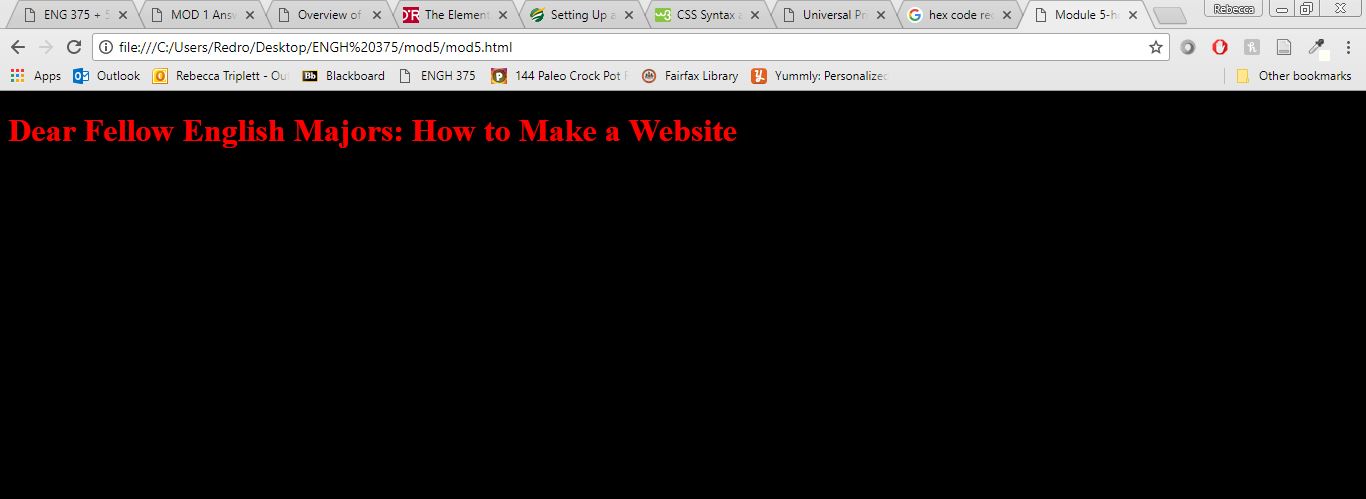
Now, onto CSS (or, where fun stuff happens)!
So, CSS – or Cascading Style Sheets – is how you make your website look nicer than this:
CSS is a language that describes how elements in your HTML are going to work and are housed externally from your HTML document. This keeps our foundational elements and our design elements separate from each other, which makes it easier to find things once you start working on larger projects.
Pro Tip: Although you can format design elements in HTML, this is bad practice and should not be attempted. HTML is for function, CSS is for design and the two shouldn’t be mixed!
Before we even get started though, here’s a cool example of how the same HTML code can be styled using CSS!
Now that you’ve seen some cool things that CSS is capable of, let’s go over basic syntax and simple properties for CSS!
- I’m actually going to direct your attention to this very handy guide from W3Schools.com, because they can explain the language a bit better than I can:

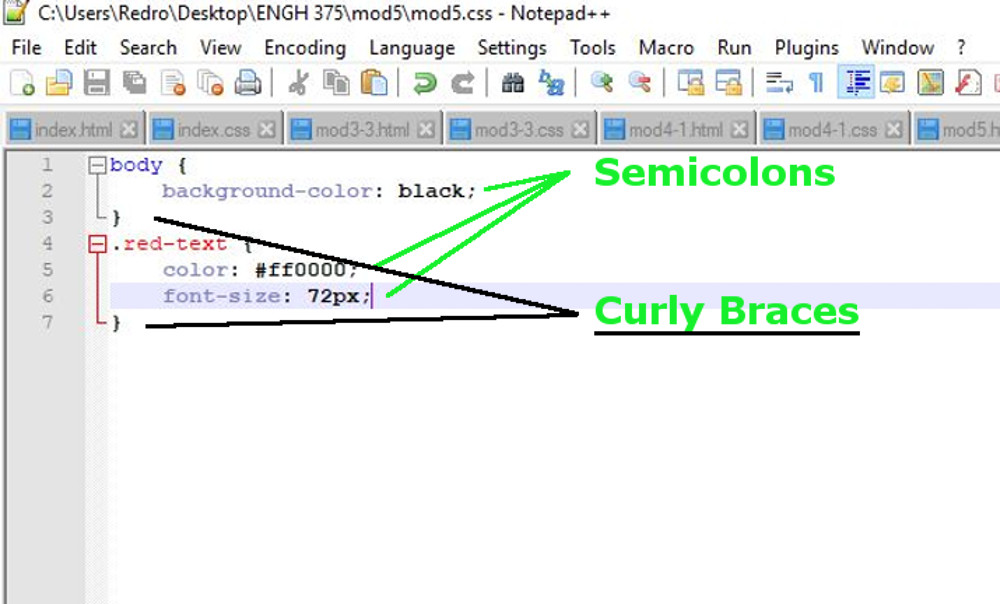
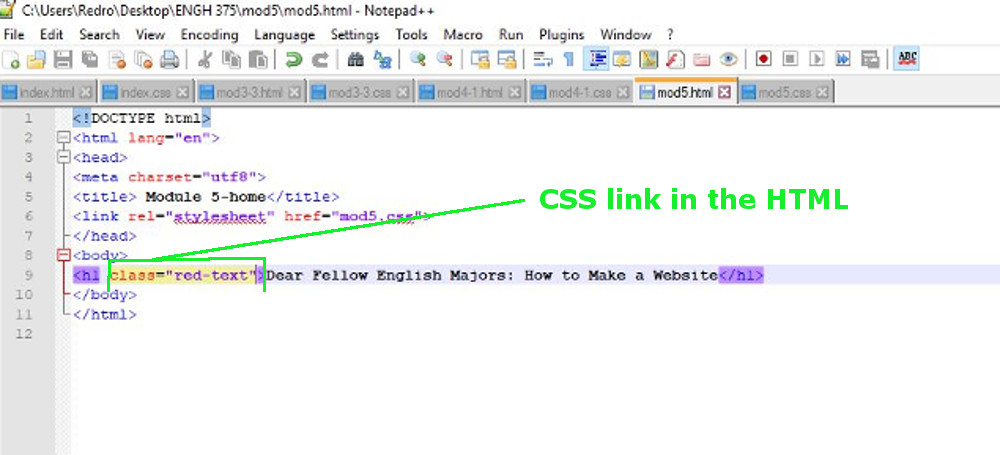
- Every selector must have either a class or an id associated with it (which are represented by . or #). A "." is a class, while a "#" is an id. These are necessary to help the computer know which elements in your CSS apply to your HTML, so don’t forget to assign put “.” in front of every selector that you don’t want applied to everything.
- After your selector you need a “{“ and then, just like in HTML, every thing that you open must be closed, so at the end of every modifier in CSS you need to close the curly brace “}”.
- After every modifier, you need a semi-colon. This indicates that you have finished a line of CSS and that you’re moving on to the next element.
- Everything that you want your CSS to apply to in your HTML must be indicated in your HTML – including your style sheet itself!
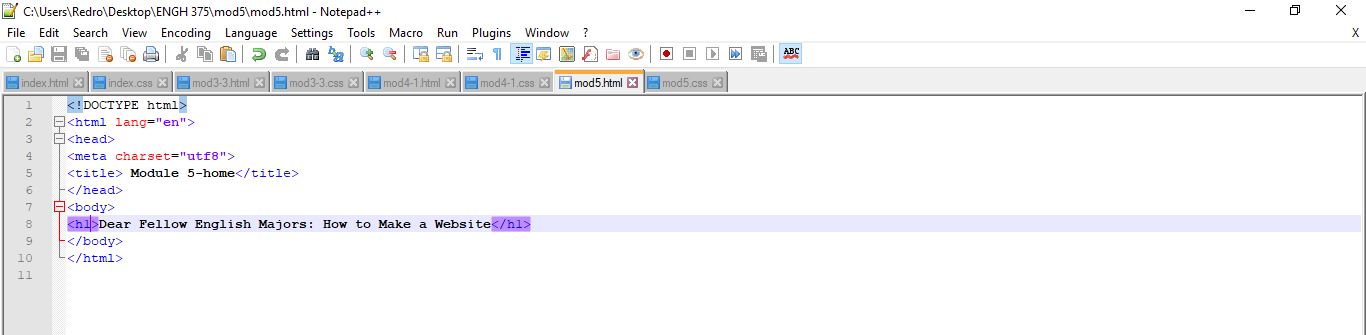
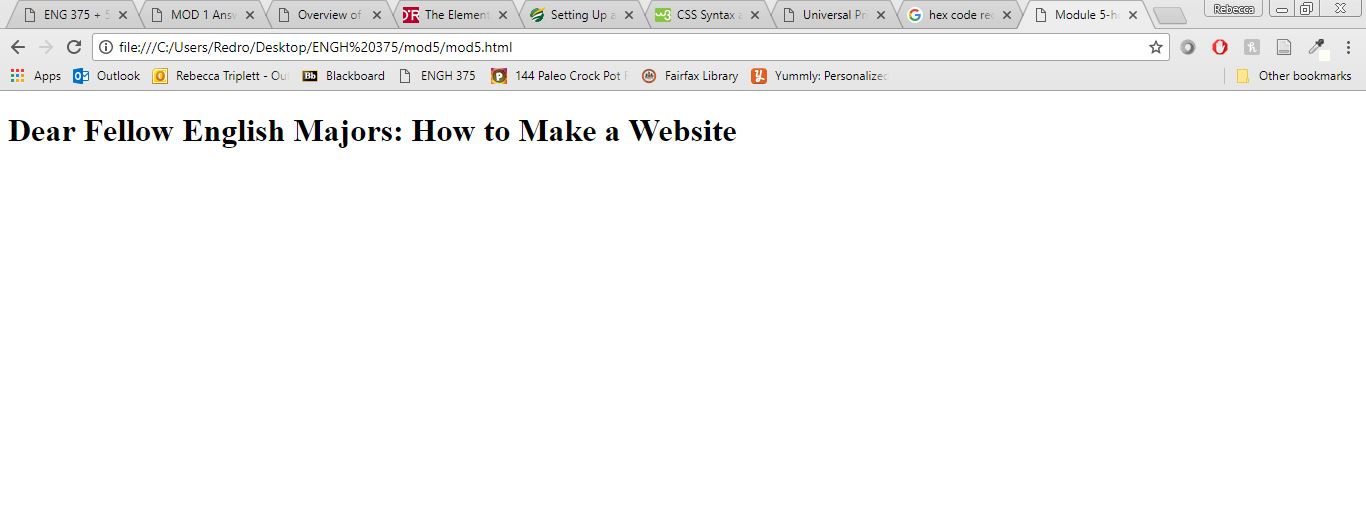
This header tag in the HTML looks like this on the webpage:
This is the same header with a basic class added to the header tag:
Pro Tip: Everything that you want linked to your site, whether it’s photos, fonts, or multiple style sheets, they all need to be in the same folder! If your computer can’t find them, then they can’t be displayed. So keep everything together!
- Basically, everything else I’ve learned about CSS has come from W3schools.com, so here is where I leave you to go forth and make cool web pages!!
Helpful Links:
- CSS Tutorials
- Help for HTML and CSS Problems
- Creative Commons
- Pexels
- Google Fonts
- Difference between Margins and Padding