A n00b's Guide to Keeping a Laboratory Notebook

Lab notebooks are the way scientists keep track of their research. Some students may think keeping these lab notebooks as tedious or even unnecessary, but try going back and remembering the exact details on what you have done in an experiment from three years, or even three weeks, before. I assure you that keeping an organized, detailed lab notebook is important. While there is really no "right way" of keeping a laboratory notebook, there are a few general guidelines all students must follow to properly keep a good, useful notebook.

General Guidelines:
  1. Do not use regular loose-leaf or spiral notebooks. For the purposes of this class, you are to use lab notebooks with a carbon copy function, which can be found in the university bookstore.
  2. The handwriting must be legible. I recommend writing everything in print, since cursive is harder to read. Illegible notebooks will result in an automatic deduction of 25 points, since I will not grade submitted lab notebooks that are hard to read. You want your records to be permanent, so always use a pen when writing in your lab notebook. Errors and/or changes should be crossed through with a single line. Do not attempt to scratch out or erase them, since you want to be able to see previous errors and/or changes.
  3. Speaking of pens, I am not so anal retentive that I will be a stickler about the types of pens you use to write in your notebooks. All I ask is that you use either blue or black ink pens, since inks in shades of fluorescent pink or electric green are not only visually annoying, but also hard to read most of the time. In addition, do not use pens that will bleed through the next page (e.g. Sharpies and felt tip pens), since that would make for a sloppy, illegible lab notebook. I personally use standard ballpoint pens or the Pilot G2 pens for their dark clean lines and non-bleeding behavior, even if I have found them to fade after the occasional ethanol spill. For the truly paranoid (or the hopelessly clumsy), you might want to try the following pens that have apparently been made to withstand the wrath of sugary/caffeinated beverages, drool puddles, or various solvents: Pigma Microns (which are used by comic book artists to ink their work), Sanford Uni-Ball Visions, Sanford Uni-Ball Gel RTs, and Pentel Hybrid Gel Rollers.
  4. Organization is key! I have specified in your syllabus how I want you to organize your notebook pages for each experiment. Do not scribble random notes in any blank spot you see on your pages. I will not grade any notebooks that are difficult to comprehend.
  5. All information in your notebook must be handwritten or represent the actual results, such as photographs and data spreadsheets. Unless you are specifically instructed to do so, do not place any photocopied material into your notebook.
  6. Include everything in your lab notebook! This includes your initial planning/strategy, notes, speculations, execution, data, observations, diagrams, and interpretation.
  7. Keep all of your lab-related notes, including the pre-lab lecture notes, in your notebook. Keep your lab manual and handouts/printouts in a separate binder.
  8. A good rule of thumb to keep in mind is to remember that all of your reports will be primarily prepared from your lab notebook. You should have enough information recorded in your notebook to prepare a decent lab report.

Your notebook should include the following information in the following order:
  1. The title of the experiment and date.
  2. The names of the members in your lab group. Be sure to include their first and last names with the correct spelling. You will be working with these students for the rest of the semester. The least you can do is learn their names and their correct spelling.
  3. The objective(s) of the lab. Summarize in 1-3 sentences what you are trying to accomplish in the lab and why you are trying to do it. Trust me. There is a difference between the two.
  4. Answers to any assigned questions or calculations. There is a reason why I would ask you periodically to do some preliminary calculations or research, and most of the time, the reason is that they will save you precious time during the lab to focus on your experiment.
  5. The materials and chemicals you will be using in the experiment. It is also helpful to make quick sketches of the lab equipment and/or any set-up you will have to make to carry out your experiment. After all, there are many types of equipment commonly used in a typical chemistry lab, which is why it's a good idea to know what they look like. Furthermore, you never know when a future experiment will require the same experimental set-up as the experiment you performed two weeks ago. For example, students in a general chemistry laboratory may find themselves required to set up a filtration device at least twice during a semester, and organic chemistry students will most likely have to set up a distillation apparatus repeatedly through the whole of the semester. Having a good reference sketch on hand for such situations will:
    1. save you time, since you won't have to take out your textbook/manual and further crowd your benchtop
    2. save you the stress of wondering if you've got the right set-up mentioned in the experiment, and
    3. save your glassware
  6. The procedure in a numbered list format. This should not be an exact copy of the instructions in your lab manual. Take the time to read it and write in your own words the procedure in a manner that is easy for you to follow.
  7. Any changes, errors, and/or deviations you have made in the procedure. This includes both accidental and incidental changes, so do not attempt to hide your errors. Unlike the perfectionist world we live in these days, in science, we actually find value in your failures, errors and mishaps.
  8. Data, raw and calculated. Use complete, coherent sentences, tables and charts when applicable. Show sample calculations with steps and the proper units.
  9. Observations. Be sure to include everything that happens during your experiment that may affect the outcome or interpretation of the experiment. This includes changes in color of solutions, formation of precipitates, fluctuations in temperature, changes in time, spills, etc). This will be especially useful when writing your discussion/conclusion later on.

Now that we have gone over the preliminary details, we can now move on to the actual task of recording data in your laboratory notebooks. Again, there is really no right way of keeping a notebook, and everyone has their own little system they have established over the years. I have included below some guidelines here and there on what I have found to be useful. Some are really helpful while others are just personal preference. Hopefully some of these tips will be helpful to you when keeping your first laboratory notebook.

Tip 1
Annotate all calculations so that all numbers and steps in the calculations are fully explained and would be easily understood by another researcher who may not be as familiar with the experiment. Be sure to include units! Most students neglect to include units in their calculations, believing that they are tedious and unnecessary. Please take the additional 1-2 seconds to include them, as you will find them to be a blessing should you ever find yourself doing lengthy calculations and/or conversions.

Tip 2
Students have asked me in the past how the fetch they're supposed to write their procedures as they carry out their experiments in the lab. I don't blame them in the least. Unless you are very familiar with an experiment, it's rather tricky to pause in the middle of a reaction to write down that you have just added 20 mL of 0.1M HCl to the reaction flask. This is why I use the following system, appropriately dubbed as "the Schornick method". It involves splitting your page in half, with one half devoted to the procedure, and the other to observations, and will look something like this:

1. Measure out 50 mL of 1.00 M HCl solution into your calorimeter.

Measure out 100 mL of 1.00 M HCl solution into the calorimeter.
We measured out 106 mL of 1.00 M HCl solution, but we spilled some on the lab bench as we were pouring it into the calorimeter. I think we lost ~10 mL, but this may affect the amount of heat absorbed.
2. Precisely weigh out ~ 0.2 g of Mg metal turnings.Mg weight = 0.198 g
3. Add the Mg to the HCl and close the calorimeter cover. Stir occasionally and monitor the temperature.Initial recorded temperature was 80 degrees, but we need to verify this with another trial.


I find "the Schornick method" extremely useful when it comes to developing lab protocols. I would write out the standard protocol ahead of time. As illustrated above, if any changes are made, I will include them in the above fashion. By using this method, if I should screw up, I will know exactly where I made my error.

Tip 3
Include all observations you have made during the experiment as well as any thoughts on why such outcomes were obtained. Detail all mistakes, problems with procedures, and any lapses in data collection, since these may contribute to any strange results at the end of the experiment. Make sure to include all reaction conditions as well. These conditions sometimes change, so record these parameters as often as you can, especially in cases where variations may affect your results.

Tip 4
Treat your notebook like your own personal diary in the laboratory. Make an entry for everything you do, even if you're only going to say, "I took the bacterial plates out of the incubator. No clones today. :-( "

Tip 5
Make quick sketches of the lab equipment you'll need as well as any experimental set-up. These diagrams do not have to be masterpieces, but you want some sort of reference should you ever need to carry out the same experiment again.

Tip 6
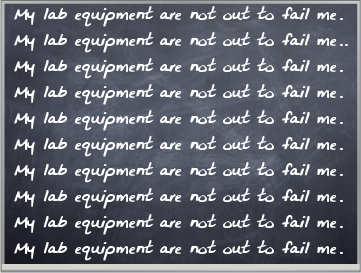
Speaking of lab equipment, consider the picture below:


Need I say more? The balance is not in league with the graduated cylinder to give you erroneous data, nor are the burets conspiring to fail you. Unless you are absolutely certain that the equipment malfunctioned in some way, do not blame your lab equipment for "giving" you faulty values. Similarly, do not blame your peers for bad experimental outcomes. There are often more logical reasons for low percent yields than merely stating that your lab partner did a shoddy job weighing out iron shavings on the scale that has supposedly always given you crappy values.

Tip 7
Give each experiment a fitting name that describes the overall experiment so that you can refer to it quickly in future entries. All protocols should also be accompanied with any preliminary notes, research, hypotheses, or goals about the experiment, and note down all measurements that have to be made. Data tables are often very useful for this purpose.

Tip 8
Apparently, I cannot stress this enough, but for good reason. Write legibly and clearly! A laboratory notebook that no one can understand or read is a worthless laboratory notebook.