
Before

Here is the original image from the Library of Congress. Started out rather scraped up and dusty, but cleans up pretty well.
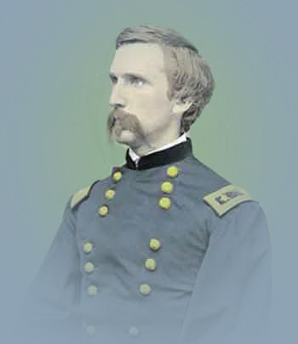
After - Color

After cropping out much of the background, I clone stamped out many of the dust particles of the remaining background and on Chamberlain himself. While doing this, the shading became a more prominent feature to how I viewed the image. Fixing two dimensional problems on a three dimensional image is trickier than I pictured it would be. After clone stamping, I chose a shade of blue I thought a Union General might have worn. I chose the paint brush tool, and the darken function and set to work. I quickly discovered that each new click, and thus new step, was adding to the darkness of my color. I did as much as I could with a medium sized brush before zooming in around the buttons and patches with a smaller brush. As long as I was already zoomed in, I worked on the button. Finding a nice brass color was a careful mix of a yellow-yellow and a browny-yellow. I tried to get as close to new-button color as I could. The General should have shiny buttons, but not so shiny the sharpshooters can pick him out. I thought maybe the General would have been sitting against an army tent when his picture was taken, so for the background I tried to make it army-green.
After - Vignette
I tried to play with the vignette color scheme and desided to match Chamberlain's uniform. It seems to downplay the green background and reduce the over-all yellow tones.
After - Sepia, Vignette

After auto-correcting everything, I played with the Hue/Saturation and got it to a nice red-sepia tone. Then, I created a new layer and added found the golden-sepia color I really wanted. After filling the new layer completely with the color, I adjusted the Opacity and Fill of the new level until it was the right shading. I then vignetted to the background color of this page, it almost works well.
After - Engraving

This engraving started out as part of a two-page spread from Harper's Weekly in the 1870s. After cutting her out of the larger picture, I placed her on a ligh colored background so her clothing would stand out. I used the paint brush in 'darken' mode and 'lighten' mode for most of the coloring, and 'overlay' mode for touching up.