Image Assignment Requirements
These images were modified for the class requirements to crop and resize a photograph, create a vignette, repair and colorize an image, and mat an engraving. Most of the images are connected through their association with the military and the post-World War Two period.
Crop, Resize, and Vignette a Photograph
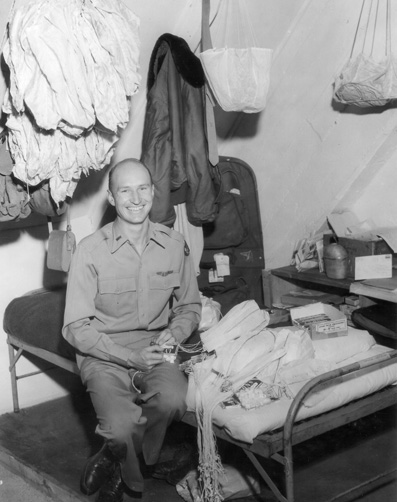
This original image is that of Air Force Lieutenant Gail Halvorsen who participated as a pilot during the heady days of the Berlin Airlift, June 1948-May 1949. His popularity grew with his reputation as he launched hundreds of parachute packets laden with candy to the children of West Berlin. For his popular heroics he was dubbed the "Candy Bomber." I selected this now famous image to crop and resize, then to produce as a vignette. The photograph is the work of the USAF and is in the public domain, available through Wikimedia Commons.
First I cropped away most of the unnecessary clutter to the top, right and bottom of the photo. That allowed LT Halvorsen to become the central focus of the image, but it left just enough of the background to provide interest and context for the subject.
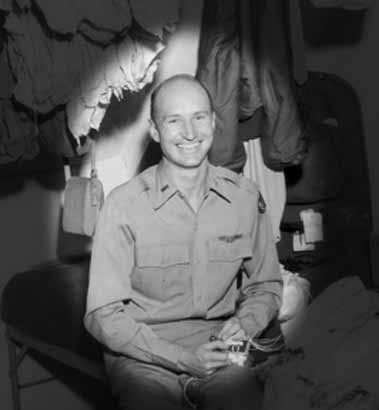
To create the vignette the Gradient Tool was used to lighten the center and darken the edges. Then the Elliptical Tool was used to select the portion of the photo to highlight. This was done to maintain LT Halvorsen as the central focus. Next Select Inverse was chosen to fill the edges around the elliptical. Color Fill Adjustment was selected as was New Layer Fill to dark the areas around the elliptical. The opacity was adjusted to approximately 80% to allow enough of the background to show through. Finally a Gaussian Blur Filter was applied to soften the edges of the elliptical.
Restore a Photograph
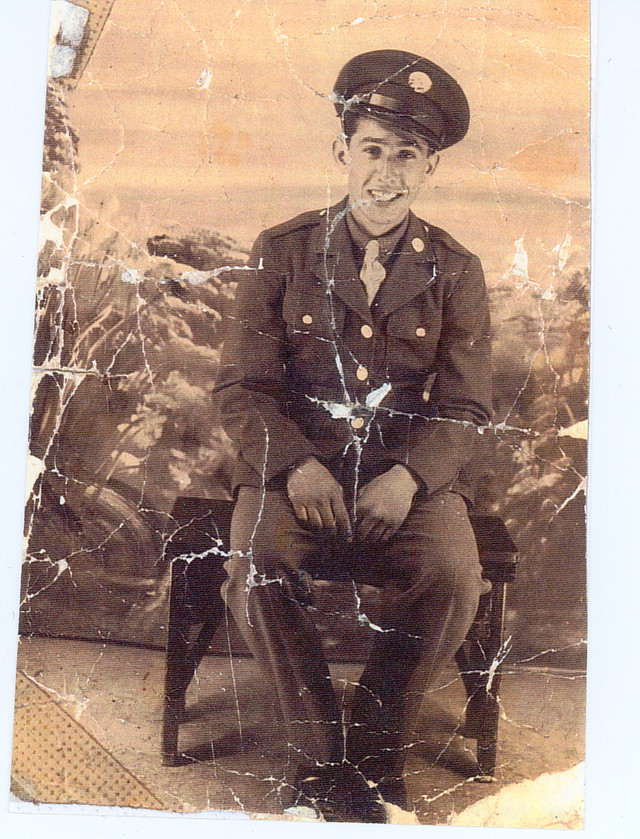
The subject for this photograph is Army Private Charles Rodriguez who later served with Merrill's Marauders in the Pacific Theater during World War Two. The image is captivating because his face shines with the exuberance and honesty of youth as yet unsullied and tarnished by the trials he would face and the horrors he would witness. The photograph is available through the Library of Congress Veterans' History Project.

I began by straightening the photograph. Then I cropped away the white border and a portion of the left side to both eliminate damage and place him more centrally in the photo. Then I selected Image and chose Auto Tone and Auto Contrast to balance and neutralize the colors. This removed the pink tint to the photo which may have been a consequence of a long term residual chemical change precipitated by the original processing. The result left an image richer in black and white highlights. This made it easier to understand the shadows and subtle shade gradiations. The majority of the repair effort focused on use of the Clone Stamp Tool. The greatest damage on the floor was easily resolved in this manner as was the damage along the edges. To repair damage to the faux background a Clone Tool with a smaller diameter was utilized. Folding or crumpling may have caused the multitude of creases to the body of the image. This in fact was the greatest challenge and was the most time consuming. Repair to the face and uniform required enlarging the photo by zooming in and using a very fine tip on the Clone Tool. In every case the tool was used care was taken not to use hard edges as this would easily show in the final product.
Colorize a Photograph
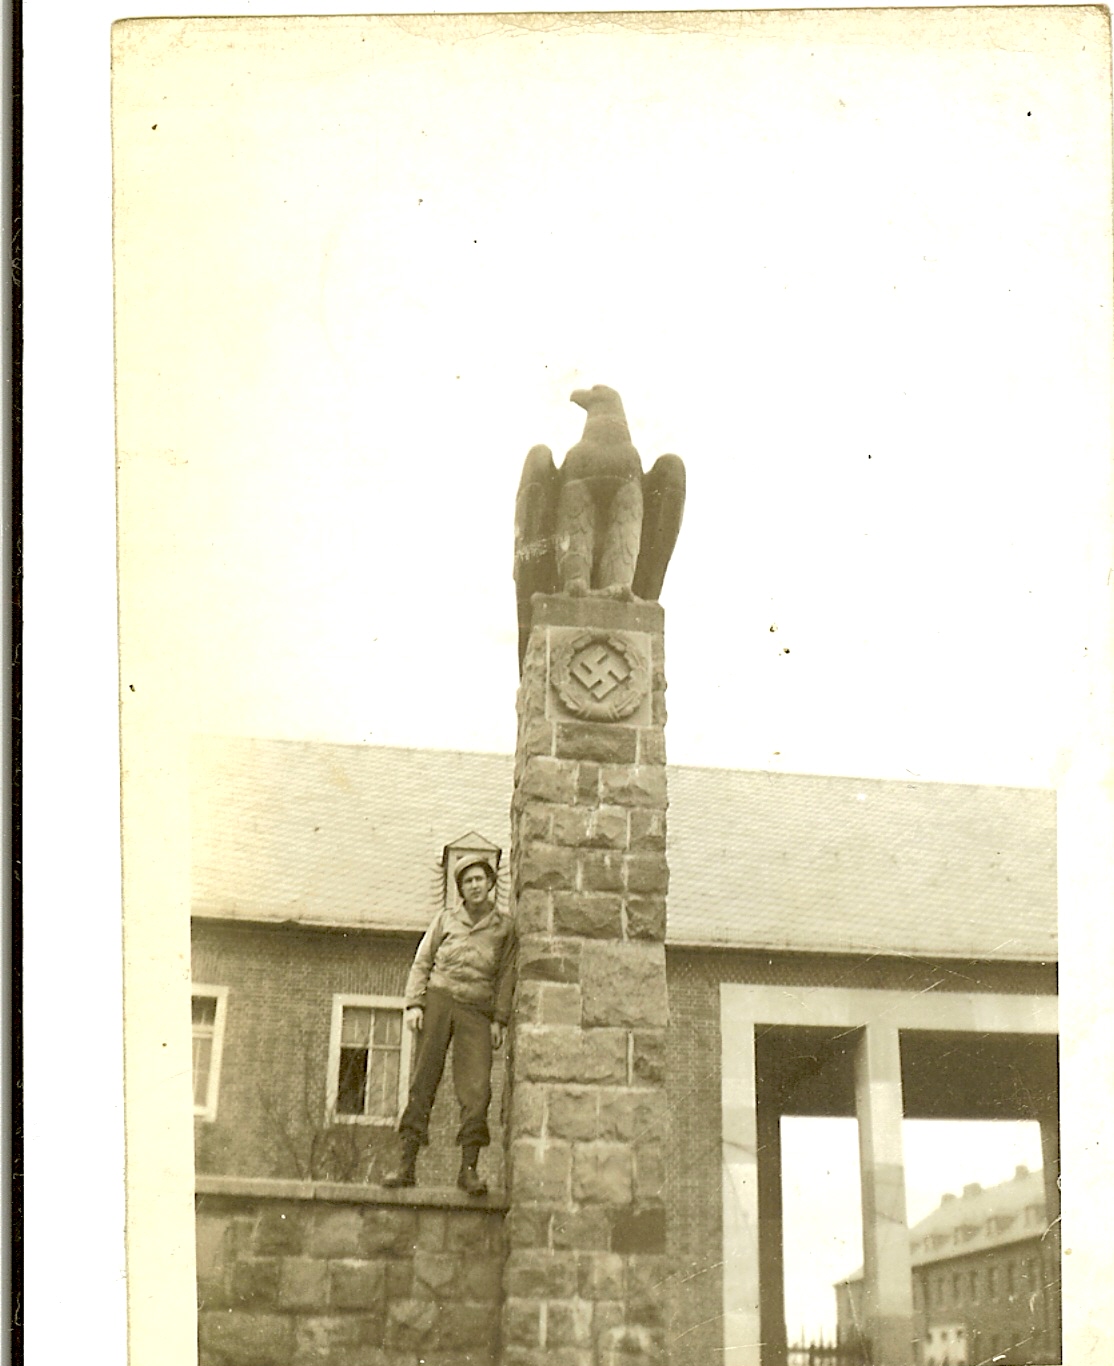
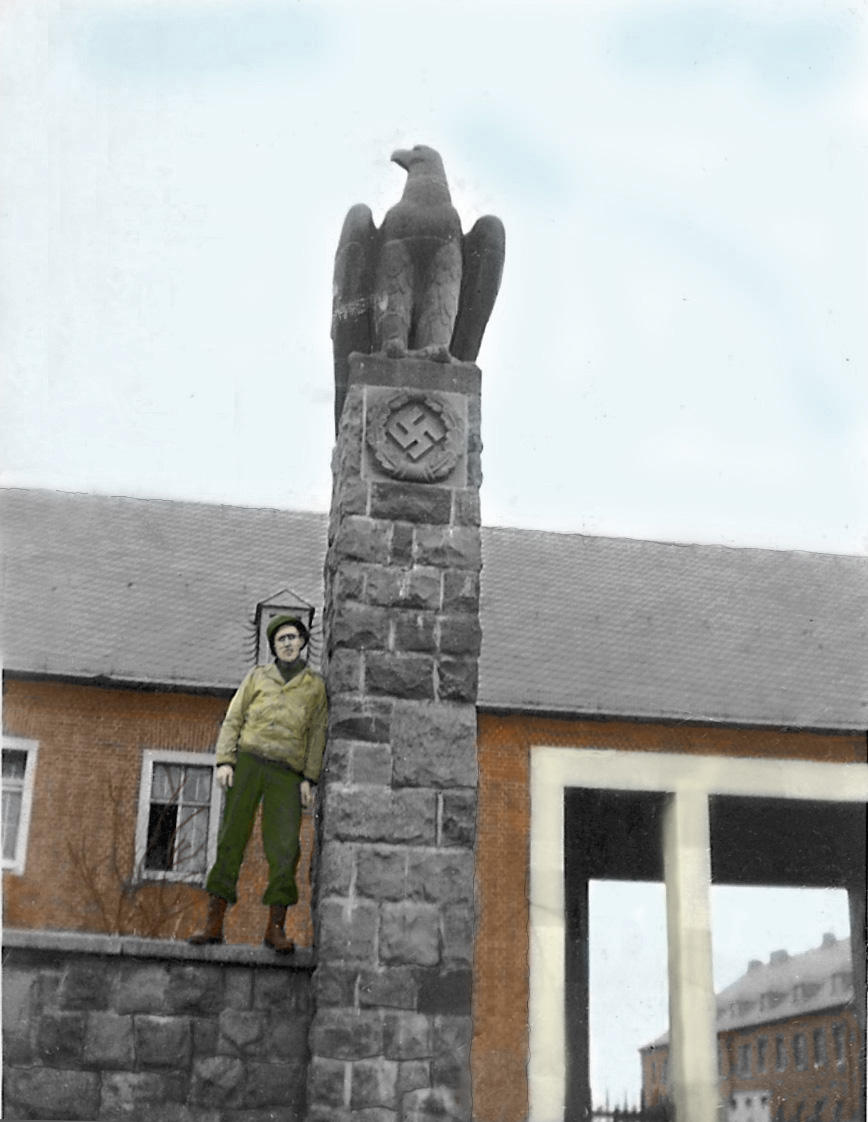
The image I chose to colorize is a World War Two photograph of my father, Private First Class Walter Lemza, who had been serving in the First Infantry Division since they landed at Omaha Beach in Normandy. The scene is that of an SS barracks they had just captured. He was 20 years old at the time. The photograph is from my private collection.
I began by scanning the image in the best resolution possible. Then I straightened it and used the Crop Tool to eliminate the borders and an excess of sky. I made various adjusts to the black and white values by using a variety of options. I utilized Curves as well as Auto Tone and Auto Contrast to resolve some contrast and value issues and correct an overexposure. I also made some adjustments using Image>Adjustments>Black and White. The scanned photo required just a few coorections for blemishes. Some small specks were eliminated with the Eraser Tool. Most of the difficult corrections were accomplished using the Stamp Tool which allowed me to compensate for the poor quality of the upper left side of the photo. To begin colorizing the photo I drew on personal knowledge of having lived in Germany for over seven years. This gave me an understanding of the weather conditions so I knew that the sky (given the lack of shadows)was typically overcast with just some hints of blue (you'll see that also reflected in windows). Also knew the roof was a mid-color slate gray. I used some research to discover the colors of his uniform. Throughout the process I used a thin opacity of 25% or less when applying colors. I wanted a realistic look and feel to the photo and wanted to avoid a faux colorization that would render a comic book look. I thought this would best honor the memory of my dad.
Mat an Engraving
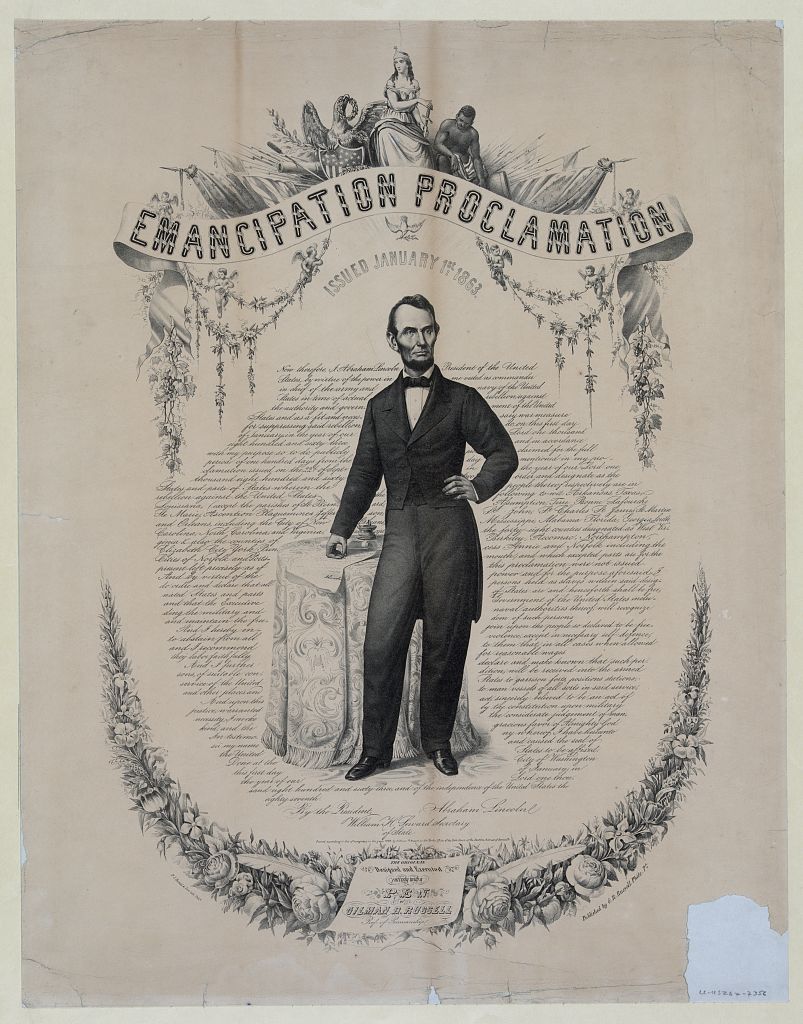
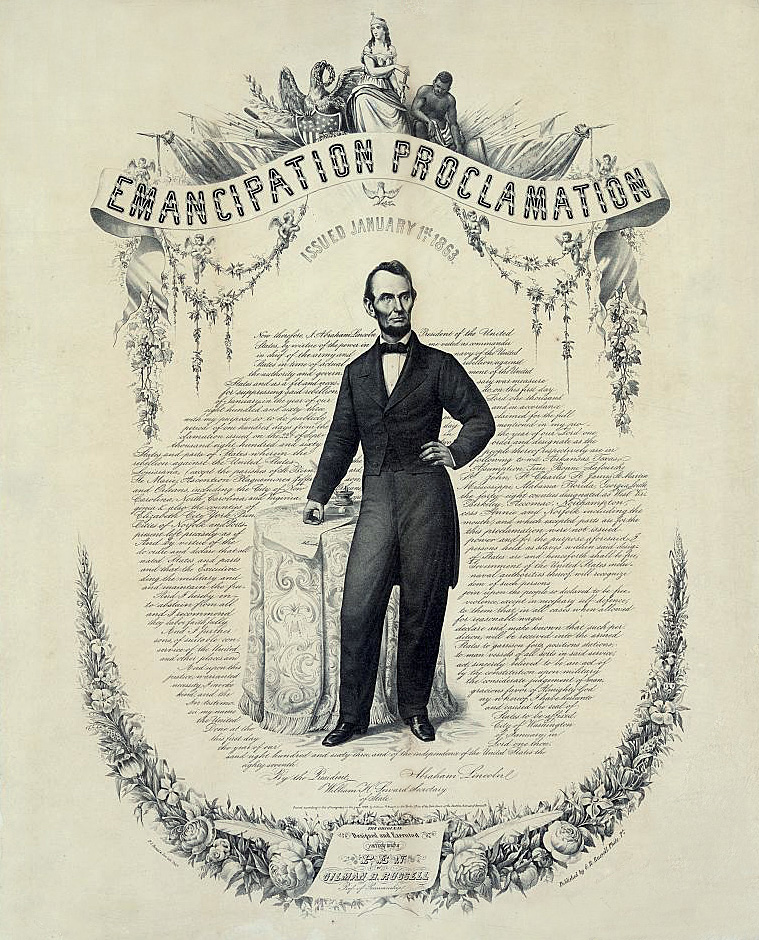
For the engraving I chose an image of Abraham Lincoln as it was difficult to find any that were contemporaries of World War Two or the modern military. The image came from the library of Congress Digital Collection. I began by cropping away the outer edges and as much of the damaged bottom as possible.Then I followed the formula for matting prescribed by Professor Petrik. I selected the Auto Adjust for Color Correction, Contrast, and Levels. Next I followed the method for creating and naming layers for the work. I ensured the foreground color was white then I selected Edit>Fill. I used Layer Style>Blending Options to clear up the background where there were darker lines either from the engraving being folded or from ferrous oxide staining. Then I used the Stamp Tool to rectify the greatest area of damage in the lower right of the engraving. The final steps were to Resize the Image and correct for resolution prior to preparing the image for the web.
Copyright 2010 John Lemza|HIST697 GMU Spring 2010
Header image source: Personal Collection of John Lemza, German postal cover commemorative for Luftbrucke, 23 June 1949.
